
If you've ever had meat that basically falls apart when you touch it with a fork, it's probably braised. But what is braising, exactly? It's the best type of slow cooking that's low effort, high reward. To braise, you just sear or caramelize the outside of meat, add some aromatics (our best friends garlic and onion), and then cover it partially with liquid and let it simmer away in the oven for a few hours. This is particularly transformative when it comes to typically tougher cuts of meat, like short ribs, brisket, pork shoulder (aka pulled pork), chuck roast (aka pot roast), lamb shanks, and chicken thighs. (Most of which happen to usually be less expensive cuts of meat!) It's very difficult to over-cook when you braise—the longer, the better for many meats that have a lot of inter-muscular fat that needs to break down.
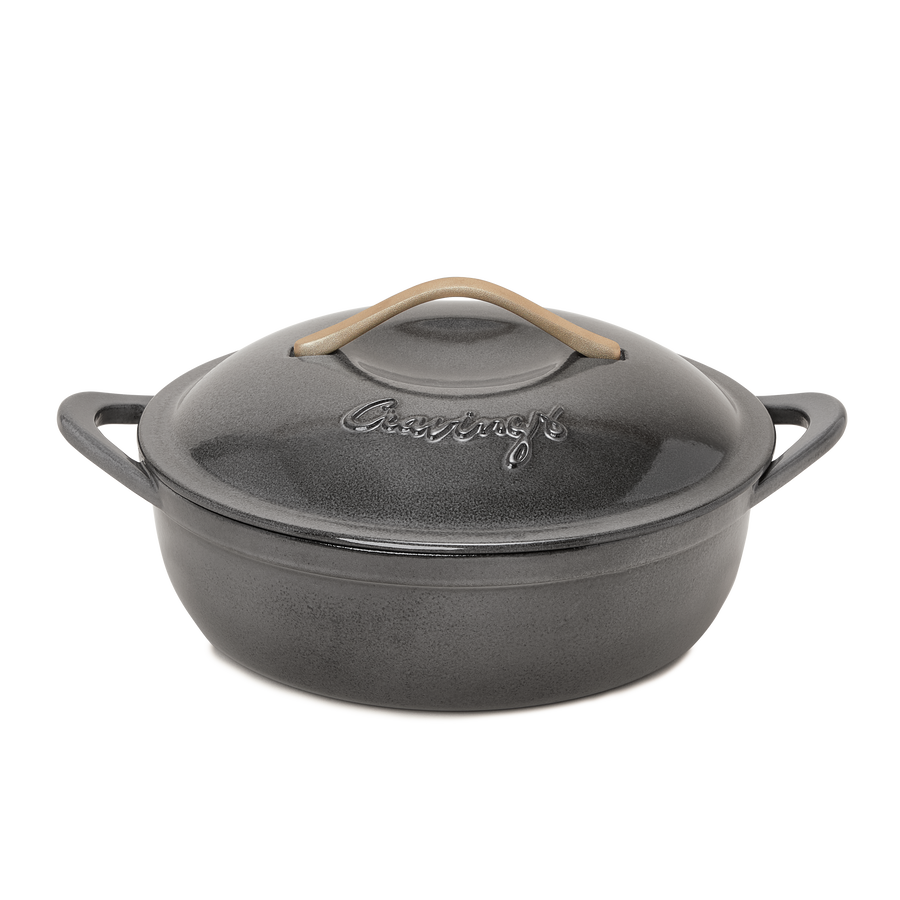
The key tool for braising is a braiser or Dutch oven. Both large, sturdy pots are made of cast iron, which retains a nice even heat so food can slow-cook away either on the stovetop or in the oven. (Braising can be done either way, or also in a slow cooker or pressure cooker like an Instant Pot.) The pot must have a lid to trap and re-circulate the moisture, allowing you to set and (mostly) forget it as you slow-cook your way to incredibly tender meat, or even vegetables like cabbage, fennel, or squash. But remember to set your timer! Ready to master this one-pot wonder? Follow along with a step-by-step guide to braising featuring our new Saucy, Savory & Tangy Pulled Pork recipe.
1. Pack on the Seasoning
Whether simple salt and pepper or a multi-ingredient rub (this one has garlic powder, cumin, brown sugar, kosher salt, paprika, chili flakes, and black pepper), seasoning is key. If you're cooking a big piece of meat, letting the meat sit with the spices overnight in the fridge will help it be evenly seasoned inside and out.
2. Have No Fear—Sear!
Heat up your braiser or Dutch oven to medium heat with a few tablespoons of neutral oil. (These oils, including canola, grapeseed, and vegetable, have higher smoking points, which is ideal for searing.) Brown the meat on all sides, making sure it caramelizes but doesn't burn, especially if you're using a rub with sugar in it. This will add flavor and lock in the juices of the meat, giving it nice texture on the outside as it becomes meltingly tender inside. It also looks nice!
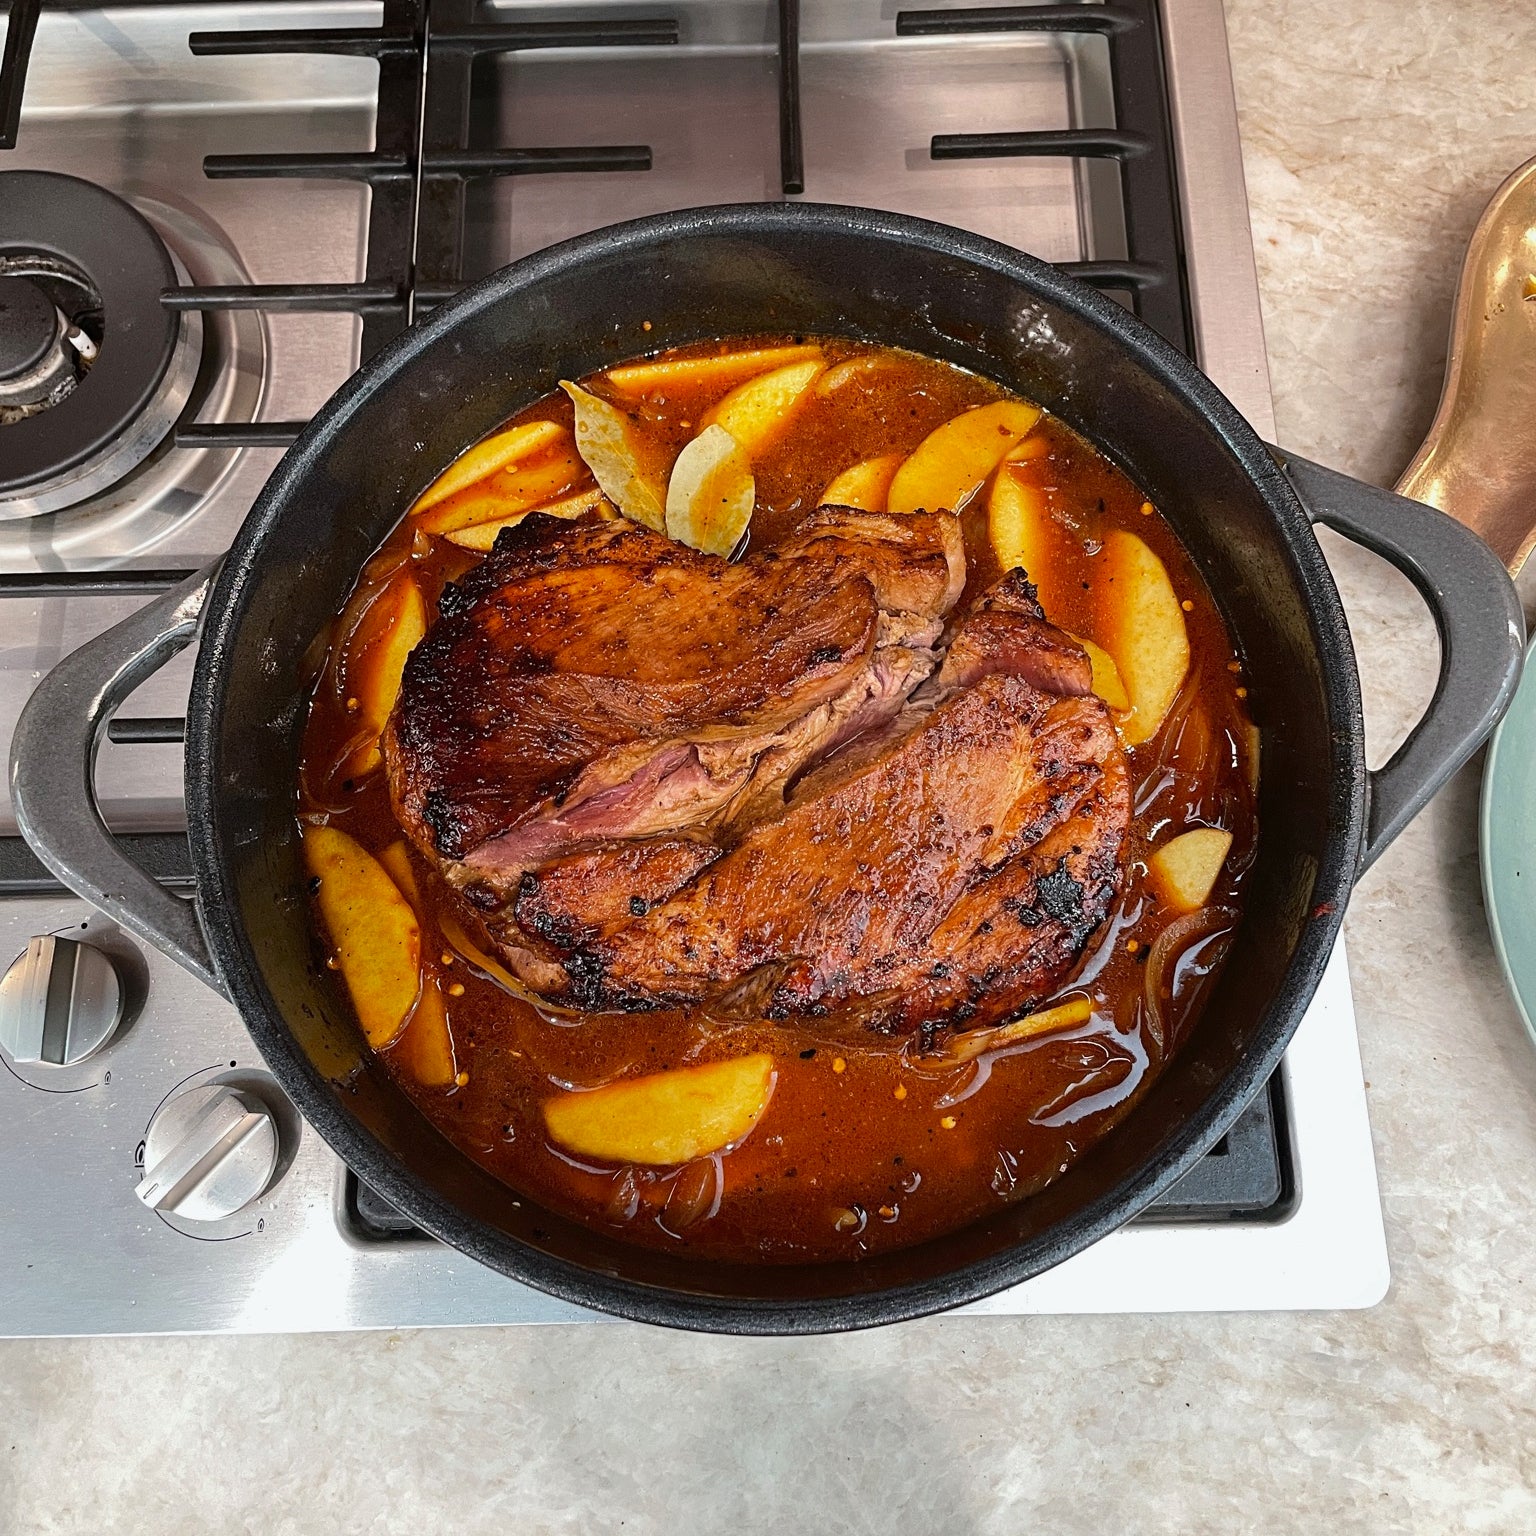
3. Add Your Aromatics
Garlic and onion are non-negotiable, but you can add any other herbs, spices, and other flavorings here. For this pork, there's also apple to bring out the sweetness of the dish. The aromatics build the flavor of the braise from the bottom up, because you not only want the meat to taste great, but also the braising liquid—and in turn, sauce—that it cooks in. Scrape up any brown bits from the bottom of the pan (called the fond) now, and also when you deglaze with liquid.
4. Deglaze and Get All the Flavor
Any brown bits that you didn't get when you added the aromatics will definitely infuse the sauce with flavorful goodness when you later add liquid—stock, water, wine, cider, vinegar, or a combination all work.
5. Add the Meat Back Into the Braising Party
Bring that liquid back up to a boil, add your meat, cover, and let it cook. You can do this on the stovetop or in the oven. The oven allows for the entire pot to be surrounded by even heat, whereas with the stovetop you may need to check on and monitor the heat more frequently. Periodically check liquid levels to make sure it's about a third of the way up the meat. This will allow the meat to consistently and gently braise rather than steam, which would happen with too little liquid, or boil, which would happen with too much liquid, affecting the texture and timing of your meal. In the oven, this is typically done at around 300°F—a lower temp for a slow cook. Braising can average around three hours of cook time, but smaller meats like chicken thighs can braise in 45 minutes, while short ribs could take up to 8 hours. You don't have to babysit a braise too much, just check on it every hour or so for liquid levels and gently flip it for more even cooking.
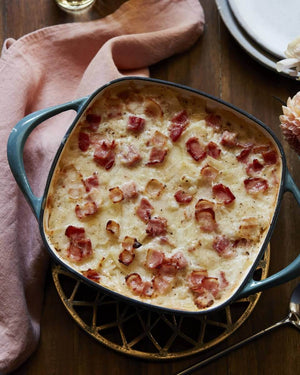
6. Shred, Slice & Savor Your Braised Meat
Now comes the best part: eating. But first you have to shred the meat (with two forks, or a fun hack is to use a low speed with electric hand mixers or the paddle attachment of a stand mixer). This pork was ready at 200°F on an instant read thermometer and fell apart as soon as it came out of the oven. For some sauces, you will reduce the braising liquid into more of a glaze, but for this BBQ sauce it was the right consistency to mix right into the pork and dive in immediately. Some things in life are worth waiting for.